Why should you include any text below Collection page?
As all SEO experts know, good content syndication is a key to promote your website on Google. This principle seems to be even more critical now after recent Google core algorithm update rolled out on May 4th, 2020 that caused quite a stir. Shopify has a high number of adjustments that allow you to optimise your content for better ranking results. And some themes like Flex enable you to design your store in no time with some additional customisations. However, there are still a few options that are essential to optimise your content that Flex is missing and one of them is the ability to add custom text underneath your items Collection.
There is, of course, an option to include all your SEO tailored content with H2, H3 etc. elements in a standard page description, but you will end up with a massive block of text at the top of the page. This is not very UX friendly as your visitor is on your page most likely to view your products and not necessarily read a 1000 words description of the Collection. This is why the idea is to keep the top description short and sweet and move all the content that Google bots are after, below the collection items feed.
Using a custom Theme template for Collection
Initially, I thought to higher somebody to code this option into Flex theme so it can be easily accessible from the Collections customisation page. After further thought, I realised that this custom code would somehow amend the collections input space (where you usually adjust your title, description and meta description). And then a custom code would have to be created to pull that information from the page and display it below items Collection feed. Although this is a more elegant solution, I have decided that since I only have several collection pages to update, a more straightforward solution can be put in place. And that’s where the idea to use Shopify theme templates came from.
Collection template structure
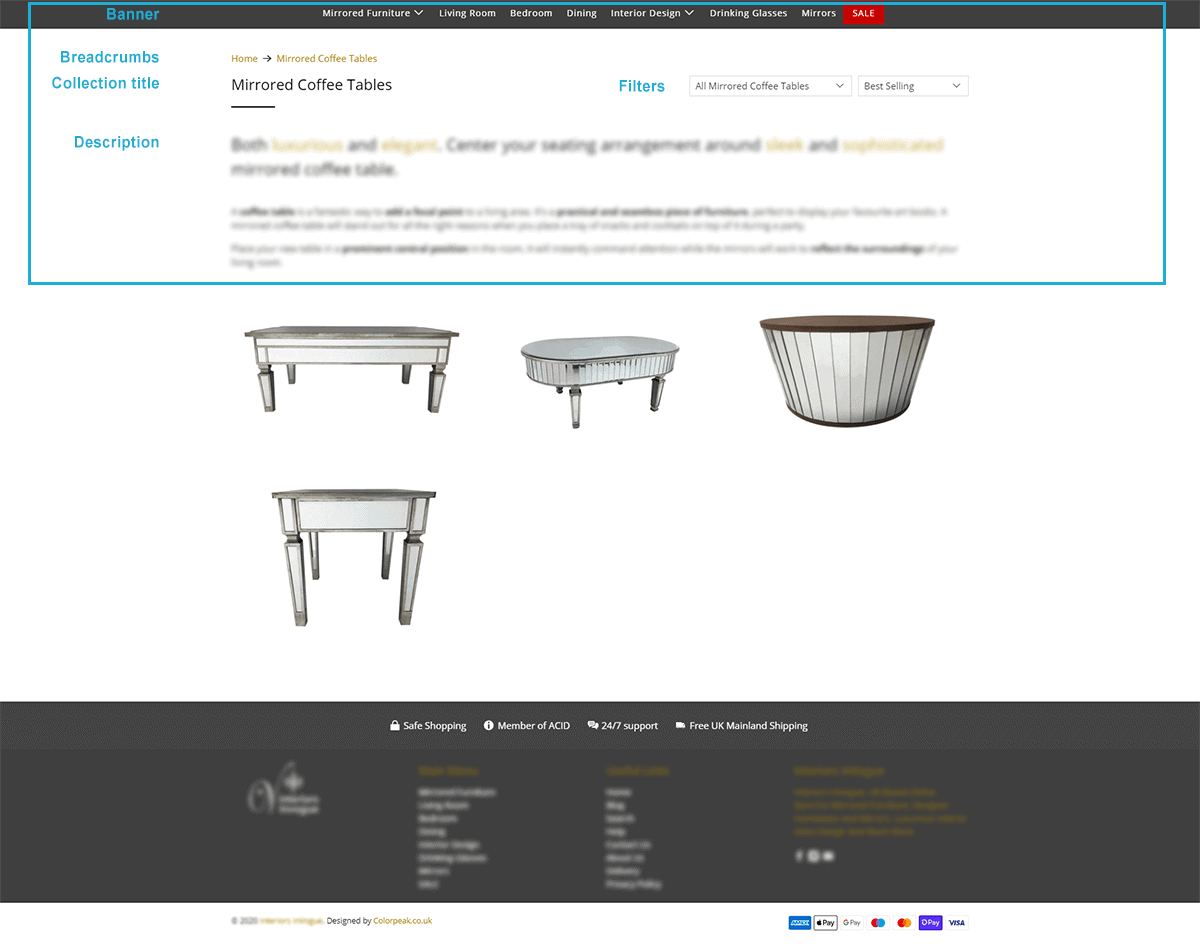
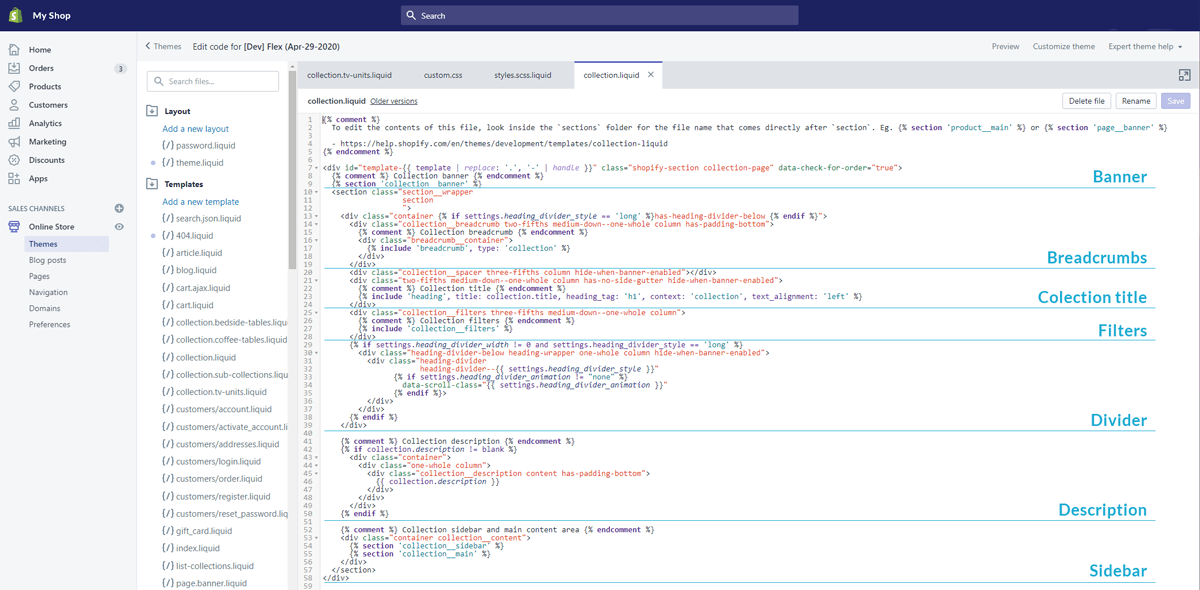
Every Collection in Flex Theme is put together from the following sections that you can adjust for your needs:
- Banner
- Breadcrumbs
- Collection title
- Filters
- Description
- Sidebar area (optional)
How to add text below Collection feed in Shopify Flex Theme?
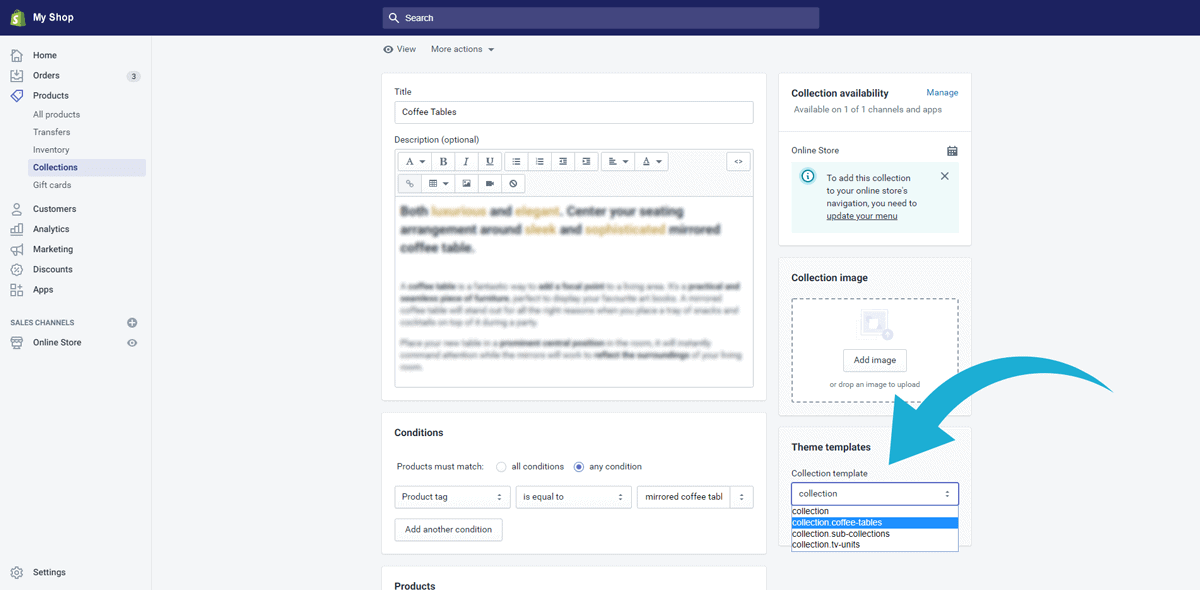
The general idea is to use the main Collection template (Collection .liquid) and duplicate it for every custom Collection in which we want to include the custom text. We will then insert a code that includes the custom text below Sidebar section. You can use basic HTML elements like H1-H6, paragraph, bold text for example, but if you want to include unsorted list you will have to create custom CSS styling as well. You can do that by creating custom.scss style sheet in the Assets folder or amending styles.scss.liquid file (remember though to back up it first before you make permanent changes). Once the custom collection template is created, you can simply go to your Product > Collections page and change the Theme template to your custom template. You then repeat that action for every Collection in which you want to include the custom text below collection feed.
How to add accordion below Collection feed?
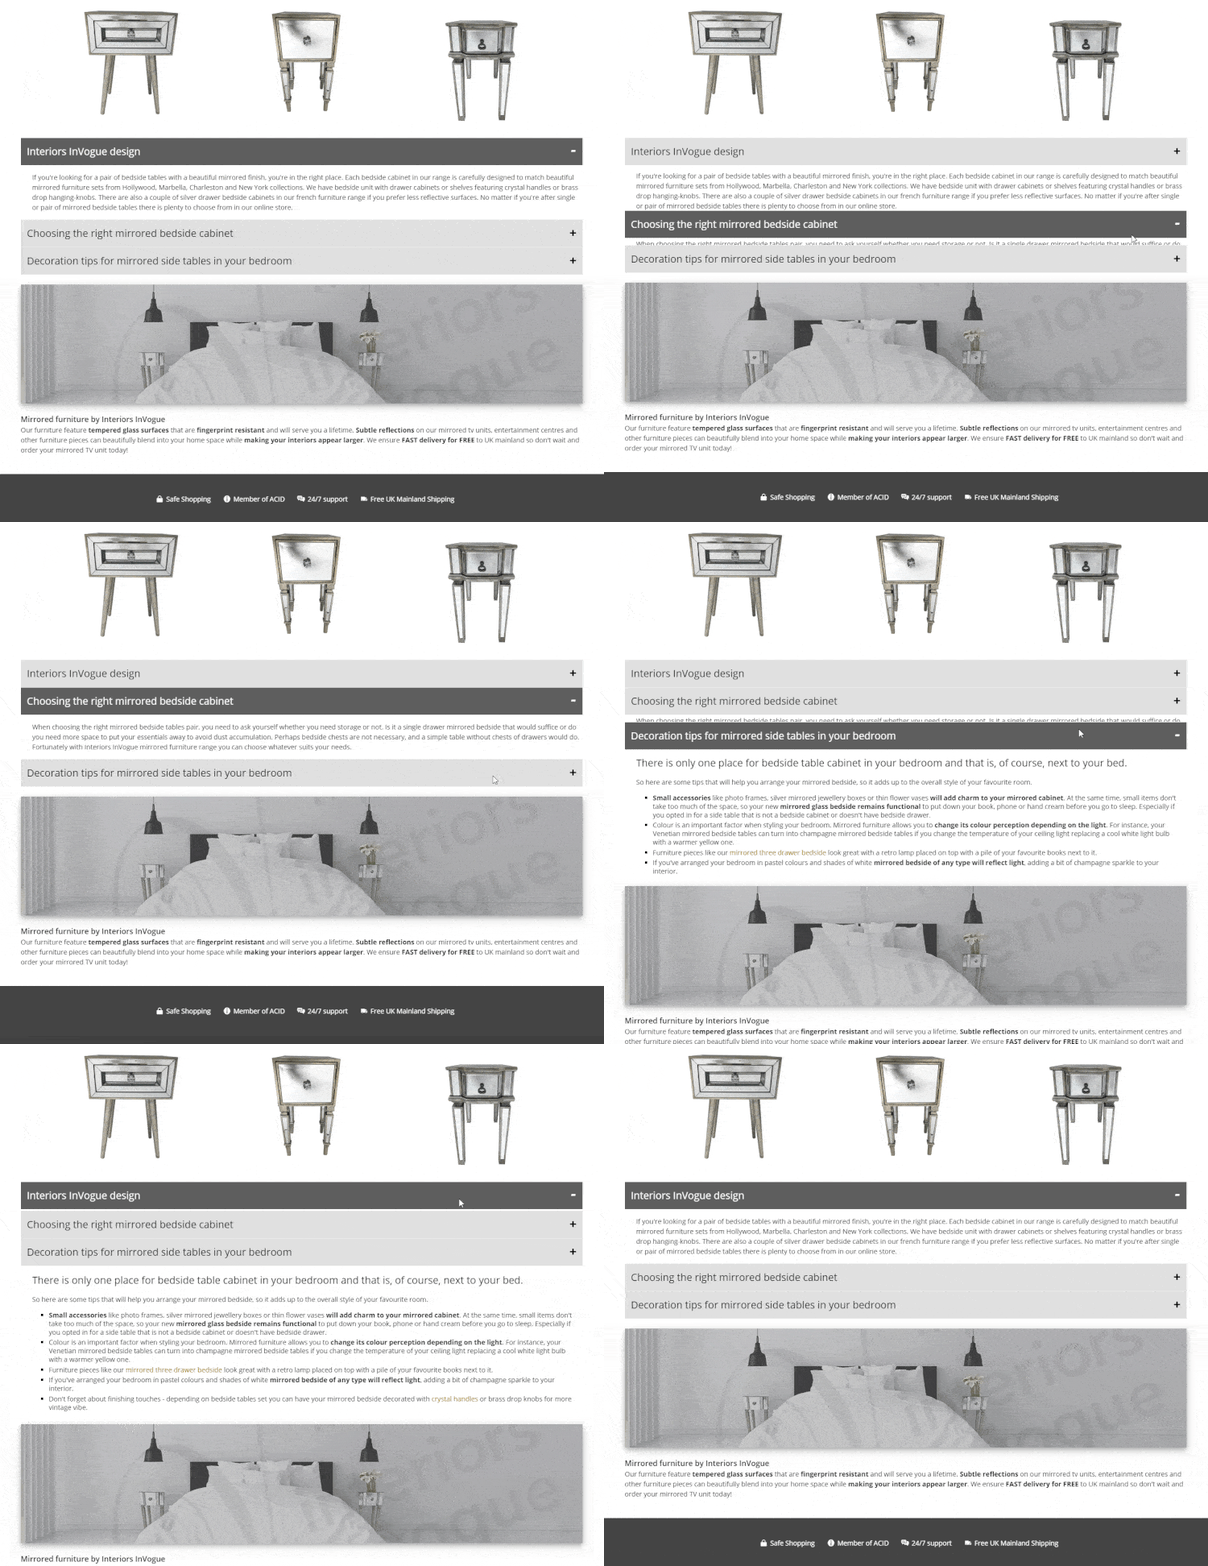
If your content is long adding text with simple styling might not be enough. In such a case, hiding paragraphs in toggles is a perfect solution. Fortunately, somebody smarter than me already came up with the ideas, so let me simply send you to this article by Leighton Taylor ‘How to add an FAQ accordion to your Shopify store‘. The tutorial includes a super easy 5 step guide, including a quick video and a demo of the solution that you will be implementing on your site. All you need to do is tweak CSS a bit for your needs and voila. And before you ask, the image was added with basic img tag
Image
<img src="yourimage.png" alt="your alt tag" style="box-shadow: 0 4px 8px 0 rgba(0, 0, 0, 0.2), 0 6px 20px 0 rgba(0, 0, 0, 0.19);" align="middle">Step by step guide on how to add unique text below every Collection Page in Shopify Flex theme:
- Log in to your shop and navigate to ‘Online Store’ in ‘SALES CHANNELS’ section listed on the right-hand side of the screen;
- Hover over ‘Actions’ button (located in ‘LIVE THEME’ section) and select ‘Edit Code’ from the drop-down menu;
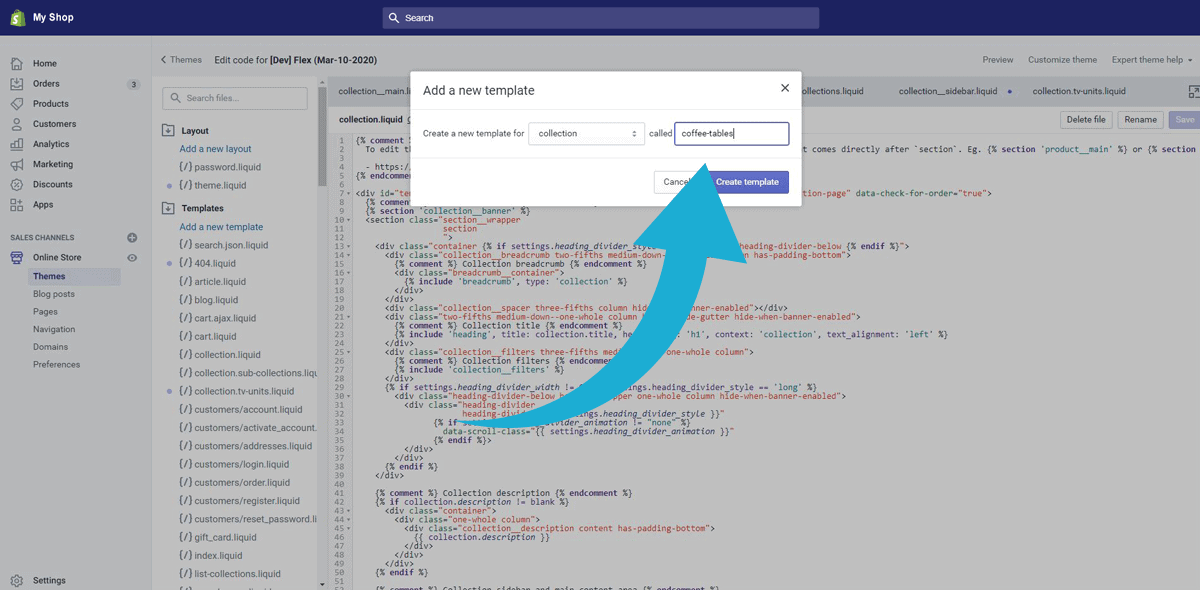
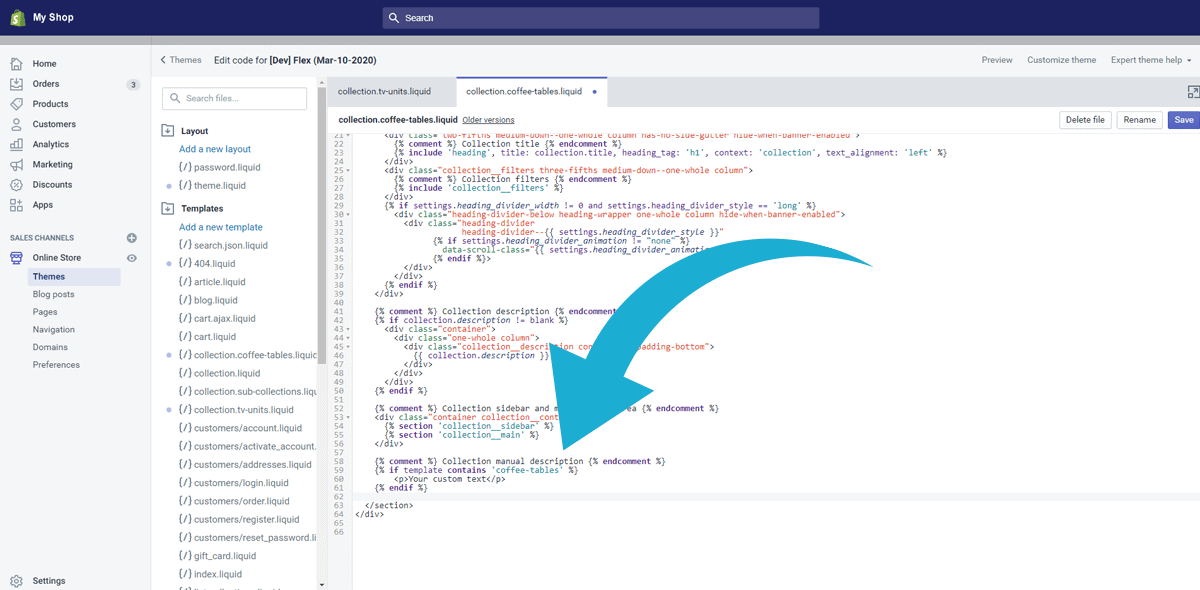
- Locate ‘Templates’ folder click blue command ‘Add new template’. In the pop-up window, select ‘collection’ after ‘Create a new template for’ and give it a name (stick to short names or if you need to use more than one word use dash instead of space bar). In our example we’ve chosen the name ‘coffee-tables’; then click ‘Create template’ button;
- Go to your newly created Collection tab and scroll down to the bottom and locate last two lines of code
	</section>
</div>- Copy and paste the following ‘Custom code’ and paste it just before those two lines and after ‘Collection sidebar’ section (in example below the code is pasted on line 58); then Save
Custom code
{% comment %} Collection manual description {% endcomment %}
{% if template contains 'your-collection-name' %}
<p>Your custom text</p>
{% endif %}- From right-hand side panel go to ‘Products’ > ‘Collections’ and look up your custom collection
- Once the collection is loaded, change ‘Collection template’ in ‘THEME TEMPLATES’ section in the bottom right corner from default ‘collection’ to ‘collection-your-collection-name’ (in case of this example ‘collection.coffee-tables); then Save
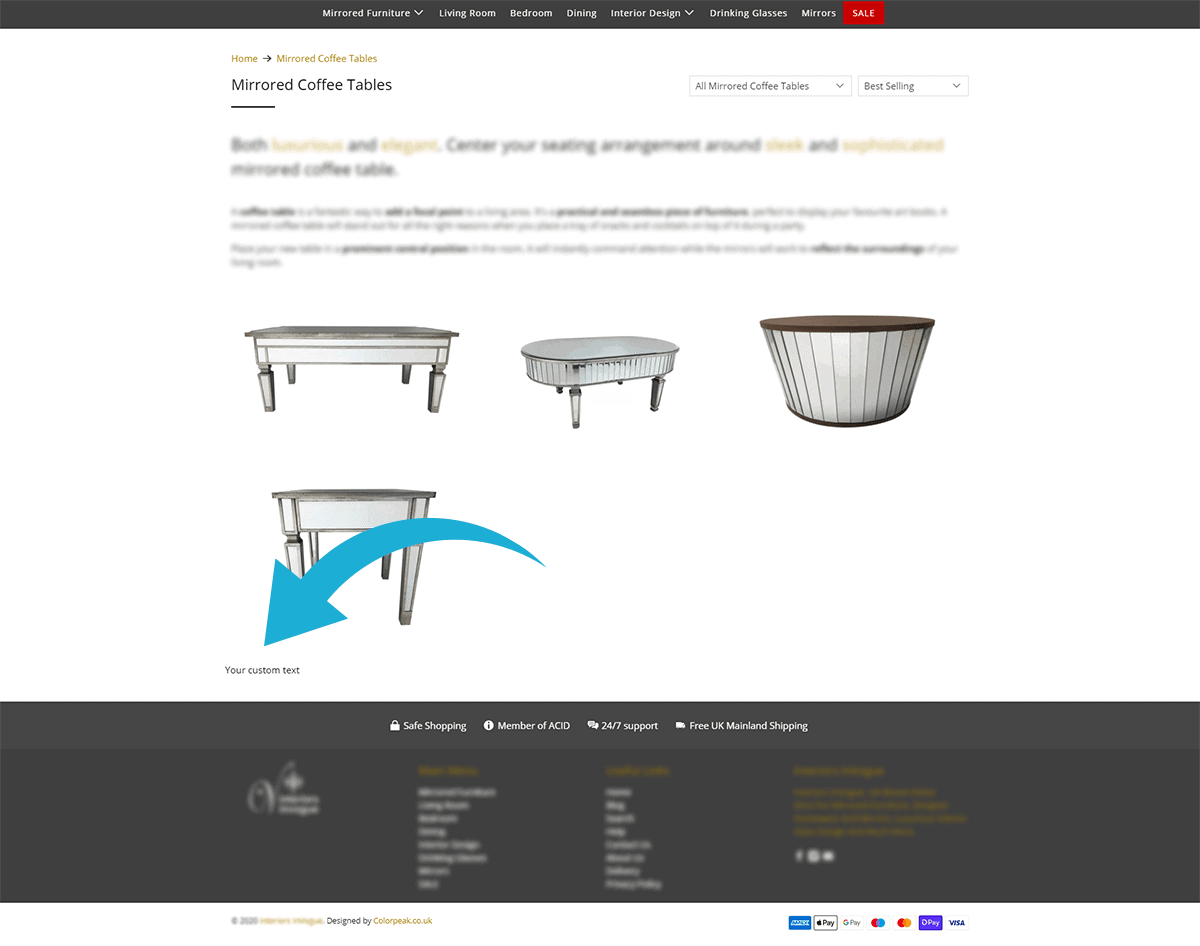
- When you view your Collection page, you should now see ‘Your custom text’ below images.

